USB flash drives are one of the most overlooked attack vectors in a corporate environment. They're cheap, easy to lose, and can carry malware or walk sensitive data straight out of your building. If your fleet is managed by Microsoft Intune, locking down removable storage takes about five minutes and doesn't require touching a single device.
This guide walks you through creating a Device Control policy using Intune's Attack Surface Reduction (ASR) feature, from the first click in the Admin Centre to verifying it worked on an end-user machine.
Why Block USB Drives?
Removable storage sits at the intersection of two major security risks, data exfiltration and malware delivery. Here's why restricting it should be on every IT team's checklist:
Two Ways to Block USB in Intune
Intune gives you two methods to restrict USB access. Both are valid, your choice depends on how much control you need:
- Attack Surface Reduction (ASR), Device Control policy, the quickest route. A single setting blocks write access to all removable storage across your managed fleet. This is what this guide covers.
- Intune Remediations (PowerShell script), more flexible, lets you target specific device types or vendor IDs. Better for environments that need to allow certain approved USB devices while blocking others.
Step-by-Step: Creating the ASR Device Control Policy
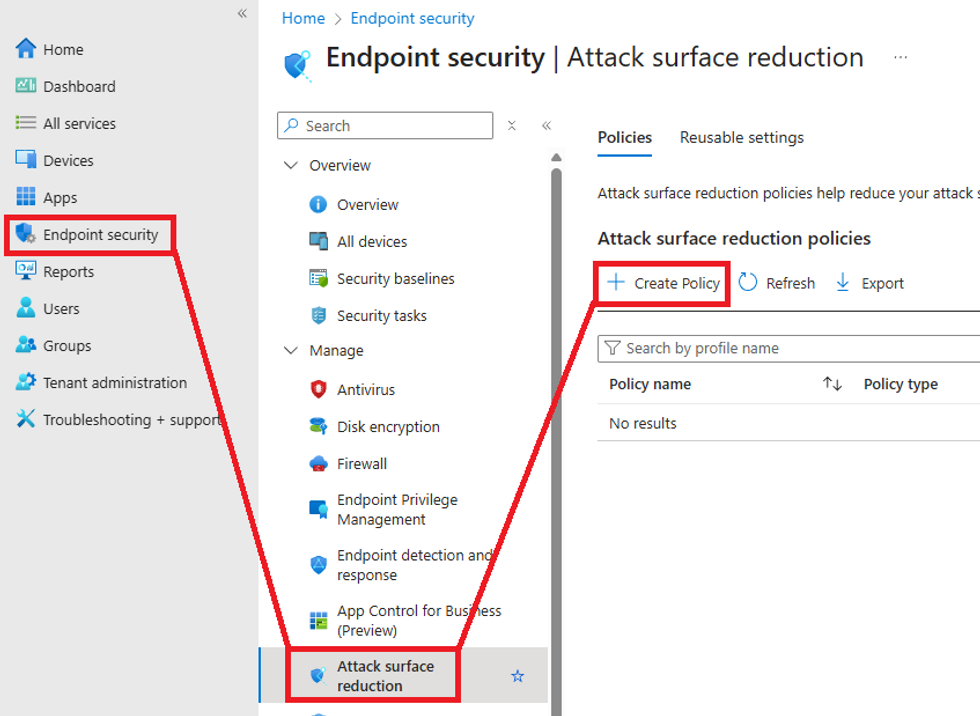
Step 1, Go to Attack Surface Reduction
Sign into the Intune Admin Centre with a Global Admin or Intune Administrator account. In the left navigation, go to Endpoint Security → Attack Surface Reduction, then click Create Policy.
Step 2, Configure the profile type
On the Create a profile screen, set the following:
Click Create to continue.

Step 3, Name the policy
On the Basics tab, give the policy a clear name and description so other admins understand its purpose at a glance.
Click Next.

Step 4, Configure the USB block setting
On the Configuration Settings tab, expand the Storage category. Find the Removable Disk Deny Write Access setting and set it to Enabled.

Step 5, Add Scope Tags (optional)
If your organisation uses scope tags to delegate admin responsibilities, add the relevant tags here. Otherwise leave the default and click Next.

Step 6, Assign the policy
On the Assignments tab, click Add groups under Included groups and select the Entra ID group containing the devices or users you want to target. You can target a pilot group first to test the policy before rolling it out org-wide.

Click Next, review the summary on the final screen, then click Save.
What the End User Sees
Once the policy has synced to a device, any attempt to write to a USB drive will be silently blocked. The user will see an error like this when they try to open or copy files to a removable drive:
F:\ is not accessible.
Access is denied.

The drive will still appear in File Explorer (Windows detects the hardware), but any attempt to read or write to it will be denied. This confirms the ASR Device Control policy is applied and working correctly.
Verifying the Policy Applied
After assigning the policy, wait for the device to sync with Intune (usually 15 minutes to a few hours, you can force a sync via Company Portal or PowerShell). Then verify from two places:
- Intune Admin Centre: Go to Endpoint Security → Attack Surface Reduction, find your policy, and check the device check-in status under the Assignments tab.
- On the device: Plug in a USB drive and confirm the access denied error appears. You can also check Event Viewer → Applications and Services Logs → Microsoft → Windows → DeviceGuard for policy enforcement logs.
What This Policy Does and Doesn't Cover
- ✅ Blocks write access to USB flash drives and external HDDs
- ✅ Applies to all users on assigned devices regardless of who is logged in
- ✅ Works on Windows 10 and Windows 11
- ✅ No agent or additional software required, built into Windows via Defender
- ❌ Does not block read access by default (use a separate OMA-URI policy for full read block)
- ❌ Does not target specific USB vendors or product IDs (use Remediations for that)
- ❌ Does not apply to non-enrolled or BYOD devices