BitLocker is Windows' built-in full-disk encryption feature. When a device is lost or stolen, BitLocker ensures the data on its drive is completely inaccessible without the recovery key, even if someone pulls the drive and plugs it into another machine. For any organisation managing Windows devices, it's one of the most important security controls to have in place.
Deploying it through Intune means you get silent, zero-touch encryption across your entire fleet, no user interaction required, with recovery keys automatically backed up to Microsoft Entra ID. Here's the full configuration.
Create the Policy
📋 Policy Setup
Go to the Intune Admin Centre and create a new Disk Encryption policy:
intune.microsoft.com
›
Endpoint Security
›
Disk Encryption
›
Create Policy

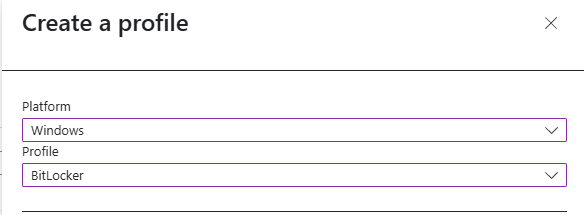
When prompted to choose a platform and profile:
- Platform: Windows
- Profile: BitLocker
Give the policy a clear name and description, something like CORP-BitLocker and "Enables BitLocker silently for all corporate Windows devices."

Configuration Settings
⚙️ Configuration
The policy has five configuration sections. Work through each one below. All settings should match exactly, particularly the silent deployment settings in the BitLocker section.

1, BitLocker
These are the top-level settings that control whether BitLocker is enforced and how it's deployed to users.
Require Device Encryption
Mandates BitLocker encryption on all targeted devices.
Enabled
Allow Warning For Other Disk Encryption
Must be Disabled for silent deployment. Prevents user-facing encryption warnings and third-party encryption notifications.
Disabled
Allow Standard User Encryption
Allows BitLocker to be initiated by standard (non-admin) users. Requires the warning setting above to be Disabled.
Enabled
Configure Recovery Password Rotation
Controls automatic rotation of recovery passwords after use. Requires recovery backup to Entra ID to be enabled.
Not Configured

⚠️
Silent deployment dependency
The two settings that enable silent deployment are Allow Warning For Other Disk Encryption → Disabled and Allow Standard User Encryption → Enabled. If you leave the warning setting enabled, users will see prompts and the deployment won't be fully silent. These two settings must work together.
2, BitLocker Drive Encryption
Sets the cipher algorithm used for each drive type. XTS-AES is stronger and the preferred choice for fixed drives, but AES-CBC should be used for removable drives that may be plugged into older Windows systems.
| Drive Type | Encryption Method | |
|---|
| Operating System Drive |
XTS-AES 256-bit |
Recommended |
| Fixed Data Drives |
AES-CBC 256-bit |
Recommended |
| Removable Data Drives |
AES-CBC 128-bit or 256-bit |
Compatible |
Choose drive encryption method and cipher strength (Windows 10 1511+)
Enabled
Encryption method, Fixed data drives
AES-CBC 256-bit
Encryption method, OS drives
XTS-AES 256-bit
Encryption method, Removable data drives
XTS-AES 256-bit

3, Operating System Drives
This is the most detailed section. Pay close attention to the TPM startup settings, the wrong values here will break silent installation.
Enforce drive encryption type on OS drives
Enabled
Select the encryption type
Full encryption encrypts all disk space including free space. Used Space Only is faster and suits new or freshly-wiped devices.
Full Encryption
Require additional authentication at startup
Enabled
Allow BitLocker without compatible TPM
False
Configure TPM startup key
Must be "Do not allow" for silent install to work.
Do not allow startup key with TPM
Configure TPM startup PIN
Must be "Do not allow" for silent install to work.
Do not allow startup PIN with TPM
Configure TPM startup
Allow TPM

Configure minimum PIN length for startup
Keep disabled, TPM startup is used instead.
Disabled
Allow improved PINs for startup
Disabled
Disallow standard users from changing the PIN or password
Not Configured
Allow InstantGo/HSTI compliant devices to opt out of pre-boot PIN
Not Configured
Enable BitLocker requiring preboot keyboard input on slates
Not Configured

Choose how BitLocker-protected OS drives can be recovered
Enabled
Configure user storage of BitLocker recovery information
Allow 48-digit recovery password
Allow data recovery agent
False
Configure storage of BitLocker recovery info to AD DS
Store recovery passwords and key packages
Do not enable BitLocker until recovery info is stored to AD DS
True
Omit recovery options from the BitLocker setup wizard
True
Save BitLocker recovery information to AD DS for OS drives
True
Configure pre-boot recovery message and URL
Not Configured

4, Fixed Data Drives
Applies to internal secondary data drives (D:, E:, etc.). Use the same recovery configuration as the OS drive.
Enforce drive encryption type on fixed data drives
Enabled
Select the encryption type
Full Encryption
Choose how BitLocker-protected fixed drives can be recovered
Enabled
Configure user storage of BitLocker recovery information
Allow 48-digit recovery password
Allow data recovery agent
False
Configure storage of BitLocker recovery info to AD DS
Store recovery passwords and key packages
Do not enable BitLocker until recovery info is stored to AD DS
True
Omit recovery options from the BitLocker setup wizard
True
Save BitLocker recovery information to AD DS for fixed drives
True
Deny write access to fixed drives not protected by BitLocker
Not Configured

5, Removable Data Drives
Controls BitLocker behaviour on USB drives and other removable media connected to managed devices.
Control use of BitLocker on removable drives
Enabled
Allow users to apply BitLocker protection on removable data drives
True
Enforce drive encryption type on removable data drives
Not Configured
Allow users to suspend and decrypt BitLocker on removable drives
False
Deny write access to removable drives not protected by BitLocker
Not Configured

Assign the Policy
👥 Assignment
Once all configuration settings are saved, assign the policy to the device group you want to target. In this example the policy is assigned to a corporate devices group, adjust to suit your environment.

✅
Test before rolling out to everyone
Assign the policy to a small test group first, one or two devices, before rolling it out to your full device fleet. Confirm encryption completes successfully and the recovery key appears in Entra ID before widening the assignment.
Sync and Verify
✅ Verification
The policy won't necessarily apply immediately after assignment. Trigger a manual sync to speed things up, either from the Intune Admin Centre under Devices → [Device] → Sync, or using PowerShell on the device:
Once synced, check encryption status across your devices from:
intune.microsoft.com
›
Devices
›
Monitor
›
Encryption Report

The report shows each device's encryption readiness and status. A device marked Encrypted has been successfully protected. Recovery keys are accessible from Entra Admin Centre → Devices → [Device] → Recovery Keys.
ℹ️
What "Not Ready" status means
A device can show as "Encrypted" but "Not Ready" in the report, this typically means the device is encrypted but hasn't yet reported full compliance back to Intune, or there's a minor configuration mismatch. As long as the device shows Encrypted, the drive is protected. The compliance status usually resolves itself after the next full policy sync cycle.